Showing posts with label baby nursery. Show all posts

Saturday, September 3, 2011

Wreath for Hospital door

My sister-in-law made a wreath for us to take to the hospital but I hung it up in Denver's room and was worried that the trip to the hospital and back might damage it some (while we're trying to lug everything else around) so I decided to make another one that would be cute but I wouldn't be heart broken if something happened to it. So, I sat down with some rubber bands, a styrofoam wreath base, a package of size 1 diapers (I used about 25), a hot glue gun and some ribbon.


Diapers and rubber bands. At least one end of the diapers should be white unless you don't mind seeing the decorations on them. These are Pampers.


Lay the diapers out flat and start rolling them from the open side first towards the closed (bottom) side of the diaper.


The key (I learned the hard way) is to roll the diaper in a slight cone shape.


It should look something like this - not a noticeable size different from the top to the bottom but it makes a big difference when you're attaching all of the diapers to the wreath. Just trust me on that one!


Then just secure them with a rubber band.


Then I started laying them out around the wreath frame to see how many I would need. In hindsight, I would wrap the wreath frame with ribbon. You can't see it once it's hung up but it does look a bit unfinished when you're just holding it.


I forgot to take pictures of putting the ribbon on. I just wrapped it around one diaper to see how much I needed then used that cut piece of ribbon as a template for all the other pieces I needed to cut. I cut them all out and then just wrapped it around the diapers and hot glued them on. Just pull the ribbon tight and put the hot glue only on the ribbon and you won't mess up the diapers (you especially want to do this if you're making this for a gift). Then I tied ribbon around the wreath base to use as a hanger and then I went around the wreath and hot glued all the diapers on.


I bought a little wooden sign at Hobby Lobby and spray painted it antique white. I knew that I wanted the wreath to match the "Oh Joy, It's a Boy" stuff I had been making so I decided to make the same thing I had made for the nurses' gift jar. I used Elmer's Spray Adhesive to secure it to the sign and then just ran baby blue ribbon through it to tie to the wreath. I hot glued it to the back of the wreath and then just made a simple bow and hot glued it to the top of the wreath.


And here it is all done! I'm pretty pleased with how it came out. I'm not going to lie - it was much harder than I thought it would be and took me about 4 hours. Will probably be the last time I make one!

Wednesday, August 24, 2011

Denver's Nursery

I finished Denver's nursery about a week ago and (finally) got around to taking some pictures. So, here they are (starting from the left side of his room and working our way around):

A sign for his bedroom door. It's a store bought metal sign from Hobby Lobby (half off for like $3). I added the vinyl and my mom bought this little owl and then added some "details" to it.

My Center Baby Shower Corsage that my sister in law made.

The left side of his book shelf. I found that frame at Ross for $4.99

The right side.

A friend of mine (and hostess at the Center shower) made us the picture frame with his ultrasound picture in it.

Here you can see the whole thing and the entrance to his room.

This wreath is on his closet door that my sister in law made. (I forgot to take pictures of his closet). Oh well, just know that it's full. :)

Another book shelf. It holds 2 more picture frames a friend of mine made, picture albums, 2 of his 3 piggy banks and just some little "forest" knicknacks.

This is the "wishing tree", that my mother made, sitting on top of that bookshelf. It was at the Waller shower and everyone was asked to leave a wish (on a leaf) for us. It's so sweet!

On the side of that bookshelf, I hung up my Waller baby shower corsage that my older sister made me.

To the side of that bookshelf is our glider and ottoman. I asked D's mother to make that blanket to hang over the back. Isn't it sweet?

This is all the little stuff on the table next to the glider.

And if you step back, this is what it looks like.

I made him a little toy bucket that sits beside that small table and his dresser. The first toy bucket wasn't big enough to hold everything he kept getting so I just spray painted another bucket (we received with bath stuff inside) and put "toys" on it with my Silhouette machine.

And this is the top of his dresser. I spray painted the white frame in the front. I had gotten it from the dollar store for just $1 :) The frame to the left, I got on clearance at Michael's for $6.99 and the frame on the right is a $3 frame from Wal-Mart. The plate I made this summer, the piggy bank was a gift from my little sister and the acorns and owl were decorations they used at the Waller shower, and were later given to us.

Stepping back, that's what his dresser looks like. My mother painted those little letters above the frame. On the other side of the dresser, I have his bouncer waiting for him. We'll be moving before too long so I decided not to paint or put up window coverings.

My mother bought him this cross that hangs on the wall to the side of his crib. My sister in law made him these sweet nursery letters that go above his crib. This is looking in his bed, on the left. I had my mother-in-law make his boppy pillow to match his nursery decor and D and I bought him his first little gloworm. The frog in the back is the stuffed animal D and I bought the day we found out Denver was a boy. It has an "It's a Boy" ribbon around his neck and when you press on him, you can hear Denver's heartbeat. Sitting with him is a bear a friend of ours gave him and the sweet little forest friends we bought him.
And stepping back, that is what his crib looks like. The sleigh -style sides don't allow the mobile to fit on the ends, so it has to sit in the front of his crib. The blankets and bumper are just for decoration. I'll be removing all of that and taking everything out of the crib when he starts sleeping in it (which will be a LONG time from now). :)
And in the corner, is his swing, the base to his bassinet (which I'll be putting in the living room), his diaper pail and then his changing table.
His changing table. Lots of goodies in each basket! :)
And the first toy bucket that I made him. :) And standing in his doorway, this is the best picture that I could get. This is his nursery. :) Now all we need is a little boy to arrive so we can use it!

Sunday, July 31, 2011

The Baby Shower Aftermath

The shower was wonderful! Denver received so many adorable things. It took 4 cars to get it all home. Needless to say, he's a little spoiled already. It's going to take me a few days to go through everything and get it all organized. A dear friend of mine came over after the shower and helped me get everything out of the bags and make piles of stuff around his room so it would be easier to see what we have and go through it.


We were so blessed to get his travel system, bath tub, bedding and high chair. So, we have all of his big stuff!


He received so many books, lots of diapers and wipes (thank goodness) and about 40 blankets!


Lots of bath stuff, our breast pump and lots of neat things like a play mat, an entertainment bar for his carseat, etc.


And we're going to be able to use almost all of the decorations they used at his shower, in his room. I can't wait to put it all together!

Friday, July 15, 2011

Nursery Plate

Last week I had a bit of time before meeting some friends for dinner so I ran into Hobby Lobby to kill some time. I got to looking around and was trying to think of something cute (and cheap) that I could make for Denver's room.
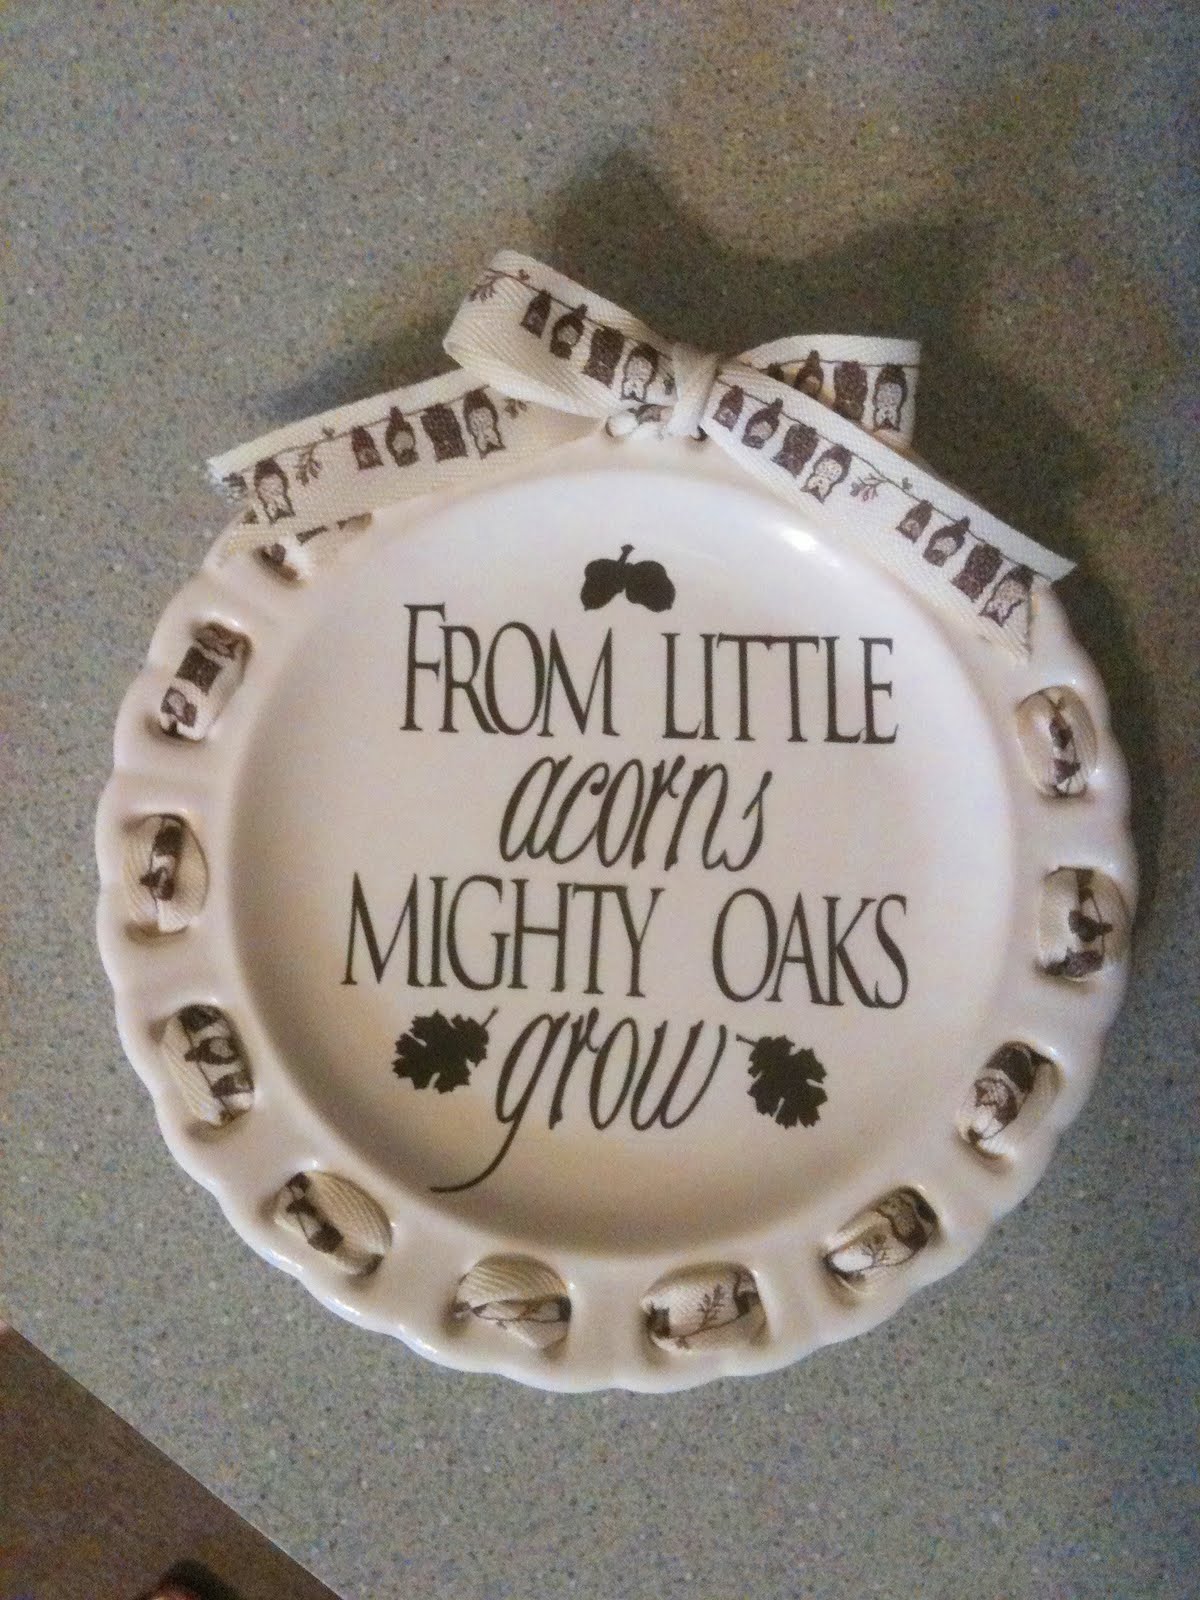
Back in the ceramics section, I found a cute little plate that was originally $3.99, but that was 50% off, and then I found a roll of Owl ribbon that was 50% off .99 cents, so I picked that up as well. Sadly, scrapbooking materials were not on sale, but I picked up some clear stickers nonetheless. My idea was to make a cute little plate to sit on a plate stand on his dresser.
These were my supplies. The ribbon doesn't really fit, so I had to fold it in half to get it to fit through the slots in the plate. I just played around with it until I could see the patterned side instead of the plain side of the ribbon, and then tied a simple bow. This is the sticker up front.
Although it was cute and I got some compliments on it, I decided that I didn't like it so I took the sticker off. And I was left with this. I decided to get my Silhouette machine out and cut something out of vinyl. I am very new to this machine, and I know I did something wrong, but I wound up having to place all of the letters one at a time, by hand, instead of just "rubbing" them off of the adhesive. This process was VERY time consuming. I'm talking about 4 hours worth of time consumption, but I'm on maternity leave so I have a little bit of time on my hands! I would never have spent that much time on a project if it wasn't for my sweet baby boy! :)
I finally got all of the letters placed and the acorns placed, but they were really too big and I had really wanted to put a oak leaf on there too, so I wasn't entirely thrilled.
So, I took the big acorns off and cut out little tiny acorns, but then the bottom looked a little bare.
So, I cut out an oak leaf but then the other side seemed like it needed something.
So I added a leaf to the other side, and liked it. But then someone suggested that I flip one of the leaves so they weren't both facing the same direction and I did. But I didn't really care for it. So, I asked D what he thought. And he liked this one the best. So, this is what we're going with! Now, I just have to go back and get the plate stand that I forgot last trip and then I'll be able to set it on his dresser. You know, when we get his dresser put together! :)